How to Install Gypsum Board Partition: A Step-by-Step Expert Guide
Dubai Gypsum Board Partition Services
How to Install Gypsum Board Partition: A Step-by-Step Expert Guide
Usman Tayyab
July 1, 2025
5 min read
Share:
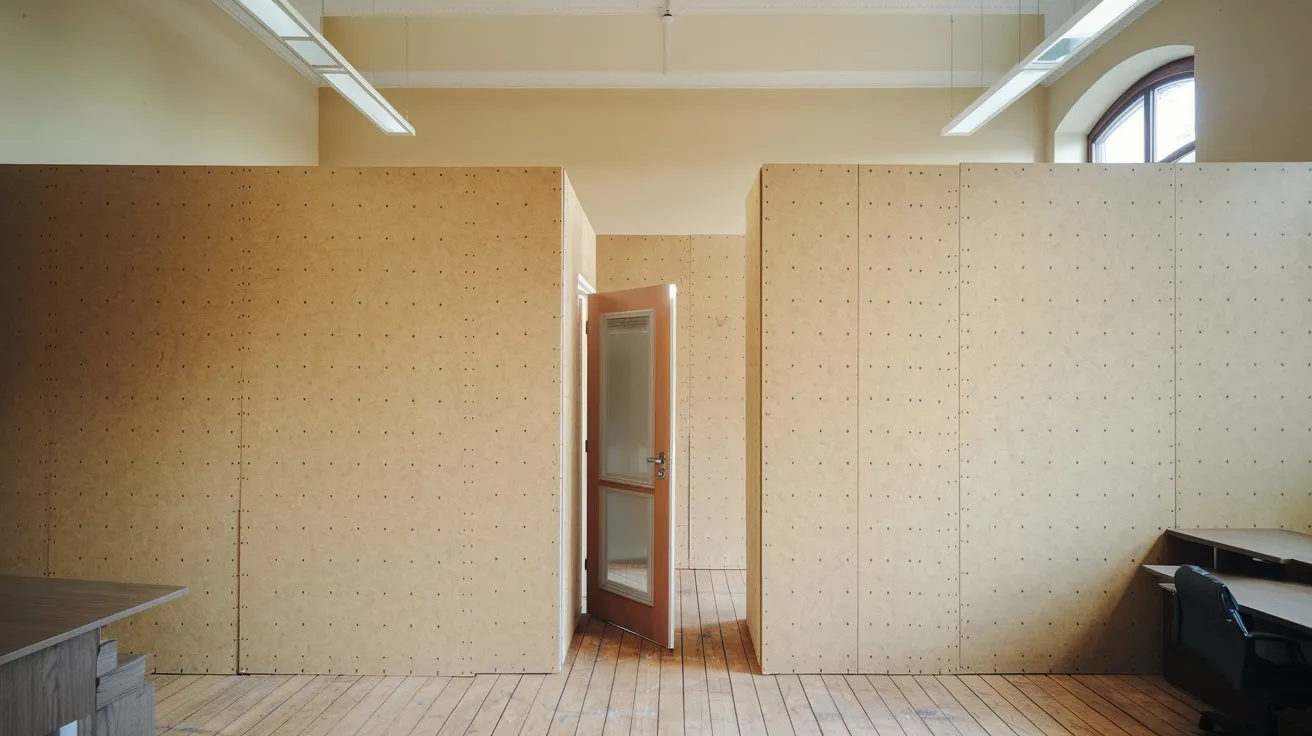
Gypsum board, commonly known as drywall, is a highly popular material used in interior partitioning for residential and commercial properties. Its affordability, fire resistance, and ease of installation make it the go-to solution for creating non-load-bearing walls. In this detailed blog, we’ll walk you through everything you need to know about installing gypsum board partitions — from planning to finishing.
Why Choose Gypsum Board Partitions?
Gypsum board offers several advantages:
Lightweight construction
Cost-effective
Easy to install and repair
Good sound insulation
Fire-resistant
Smooth finish for painting or wallpaper
Whether you're remodeling an office, dividing a large room, or creating temporary spaces, gypsum board partitions offer versatility and efficiency.
Materials and Tools Required
Before you begin the installation process, gather the following materials and tools:
Materials:
Gypsum boards (12.5mm standard for walls)
Metal studs and tracks (U-channel and C-channel)
Drywall screws
Joint compound
Joint tape or paper tape
Corner beads (if needed)
Insulation (optional for soundproofing)
Primer and paint or wall finish
Tools:
Tape measure
Spirit level or laser level
Drill/screwdriver
Utility knife
Drywall saw
T-square
Joint knife/trowel
Sandpaper or sanding sponge
Safety gear (gloves, goggles, mask)
Step-by-Step Guide: How to Install Gypsum Board Partitions
Step 1: Plan the Partition Layout
Start by measuring the area where the partition wall will be installed. Mark the wall and floor using a pencil or chalk line to determine where the tracks will go. Use a laser level or spirit level to ensure vertical and horizontal accuracy.
Tip: Take into account any electrical wiring, plumbing, or doors that will be needed in the partition.
Step 2: Install the Track (Floor and Ceiling Channels)
Secure the U-shaped floor track to the floor using appropriate fasteners (concrete screws or anchors).
Repeat the same with the ceiling track, ensuring it’s aligned with the floor track using a plumb line.
Step 3: Fix the Vertical Studs
Insert the C-channel studs into the tracks, spaced typically 24 inches (600 mm) apart.
Ensure all studs are plumb and secure them using screws through the track.
Additional vertical support may be needed around door frames or for heavy fixtures.
Step 4: Install Electrical and Plumbing (if needed)
Before fixing the gypsum boards, install all internal wiring or plumbing.
Drill holes through studs to run wires or pipes.
Use protective grommets to avoid cutting cables on metal edges.
Step 5: Fix the First Layer of Gypsum Boards
Measure and cut the gypsum boards to fit the height of the wall.
Use drywall screws to attach the board to the metal studs, placing screws every 12 inches (300 mm).
Leave a 5-10mm gap at the floor to prevent moisture absorption.
Pro Tip: Stagger vertical joints between two sides to avoid alignment and increase structural integrity.
Step 6: Apply Joint Tape and Compound
Use joint tape to cover seams between gypsum boards.
Apply the joint compound using a joint knife. Smooth it over the tape and screw holes.
Allow it to dry for 24 hours, then apply additional layers as needed (typically 2–3 coats).
Sand it smooth once completely dry.
Step 7: Install Finishing Touches
Install corner beads for clean and protected edges.
Apply primer and then paint or apply wallpaper.
You can also add skirting boards or trims as needed.
Step 8: Optional Soundproofing or Fire-Rating Upgrades
For enhanced performance, add mineral wool or fiberglass insulation between the studs.
Use fire-rated gypsum boards if required by building regulations.
Tips for a Smooth Gypsum Partition Installation
Always double-check measurements before cutting.
Use sharp tools for cleaner edges.
Wear safety equipment when cutting or sanding boards.
Store gypsum boards flat in a dry place before use.
Avoid using gypsum board in areas with high moisture like bathrooms (unless using moisture-resistant types).
Common Mistakes to Avoid
Mistake
Why It’s a Problem
Not checking level or plumb
Can result in crooked walls
Overdriving screws
Damages board and weakens hold
Not staggering joints
Reduces strength and may crack over time
Skipping primer
Paint finish may be uneven or peel
Cost of Installing Gypsum Partition (Rough Estimate)
Item
Approx. Cost
Gypsum boards (12.5 mm)
AED 18 – 30 per sheet
Metal Studs/Tracks
AED 8 – 15 per meter
Joint Tape, Screws, Compound
AED 70 – 120 (per 10 sq. meters)
Labor (Installation & Finish)
AED 15 – 30 per sq. foot
Note: Costs vary based on brand, location, and design complexity.
FAQs
{"@context":"https://schema.org","@type":"FAQPage","@id":"https://dubaiclean.com/how-to-install-gypsum-board-partition-a-step-by-step-expert-guide/","mainEntity":[{"@type":"Question","name":"<strong>Q1: Can I install gypsum partitions on my own?</strong>","acceptedAnswer":{"@type":"Answer","text":"Yes, with the right tools and patience, it's a manageable DIY project. However, for large spaces or complex designs, hiring a professional is advised."}},{"@type":"Question","name":"<strong>Q2: How long does it take to install?</strong>","acceptedAnswer":{"@type":"Answer","text":" While not as strong as brick walls, they are sturdy enough for general use and can support light shelves or fixtures."}},{"@type":"Question","name":"<strong>Q3: Are gypsum board partitions strong?</strong>","acceptedAnswer":{"@type":"Answer","text":" While not as strong as brick walls, they are sturdy enough for general use and can support light shelves or fixtures."}},{"@type":"Question","name":"<strong>Q4: What kind of paint should I use?</strong>","acceptedAnswer":{"@type":"Answer","text":"Use water-based or acrylic emulsion paints. Apply primer before the first coat."}},{"@type":"Question","name":"<strong>Q5: Can I hang heavy objects on it?</strong>","acceptedAnswer":{"@type":"Answer","text":"Yes, but you’ll need <strong>drywall anchors</strong> or fix them to the metal studs behind the board."}}]}
Q1: Can I install gypsum partitions on my own?
Yes, with the right tools and patience, it's a manageable DIY project. However, for large spaces or complex designs, hiring a professional is advised.
Q2: How long does it take to install?
While not as strong as brick walls, they are sturdy enough for general use and can support light shelves or fixtures.
Q3: Are gypsum board partitions strong?
While not as strong as brick walls, they are sturdy enough for general use and can support light shelves or fixtures.
Q4: What kind of paint should I use?
Use water-based or acrylic emulsion paints. Apply primer before the first coat.
Q5: Can I hang heavy objects on it?
Yes, but you’ll need drywall anchors or fix them to the metal studs behind the board.
Conclusion
Installing a gypsum board partition is a practical way to divide space without the cost and mess of traditional masonry. With the right materials and steps, you can transform your room efficiently and affordably. Whether it's for office use, home renovation, or temporary arrangements, gypsum partitions offer a fast, reliable, and customizable solution.