Introduction
Cleaning a domestic water tank is a must if you want to ensure your home’s water stays safe and clean. In places like Dubai, where the heat and dust can quickly lead to dirt and debris building up, it becomes even more important. Normally, cleaning a water tank means draining it completely, but there are simpler ways to clean your tank without removing the water. This method saves time and avoids the hassle of refilling. In this guide, I’ll share why it’s vital to keep your water tank clean, how to clean it without draining, and the safety steps you should follow during the process. Learn more about the differences between DIY and professional tank cleaning.
Why Regular Water Tank Cleaning is Essential
Regularly cleaning your water tank is key to keeping your home’s water safe and healthy. Over time, tanks can collect sediment, algae, bacteria, and other impurities, which can contaminate the water. This buildup affects the taste, clarity, and quality of the water, and if left unchecked, it can lead to serious health problems. In a place like Dubai, where the heat and dust are constant, water tanks are more likely to become contaminated, making regular cleaning even more important.
By cleaning your tank often, you make sure the water stays free from harmful substances. This prevents illnesses and helps keep your domestic water system hygienic. It also extends the life of your tank, saving you from expensive repairs or replacements. Regular cleaning improves the tank’s performance, too, ensuring smooth water flow and optimal operation, which can even reduce your energy bills.
In short, cleaning your water tank isn’t just about looks; it’s about protecting your health, keeping water quality high, and making sure your water system works well all year long. Read about how to prevent bacteria and algae growth in your water tank.
Methods to Clean Your Domestic Water Tank Without Draining It Completely
Cleaning your water tank without draining it entirely is a smart and hassle-free way to keep your water fresh while avoiding too much disruption. Here are some methods you can use to clean your tank and keep the water in place:
Siphoning Techniques to Remove Sediment
One of the best ways to clean your tank without draining it is using a siphoning technique. You can attach a hose to the tank’s drain valve and siphon out the sediment and debris that settle at the bottom. This helps clear out the sludge without needing to remove all the water, leaving your tank cleaner while keeping most of the water intact.
Utilising Submersible Vacuums
A submersible vacuum is perfect for sucking up debris and sludge from the bottom of the tank. It lets you clean thoroughly without draining the tank. Simply lower the vacuum into the water, and it will suck up all the impurities, making sure your water stays clean. Submersible vacuums are especially useful if there’s a lot of sediment build-up.
Applying Approved Disinfectants Safely
Once the sediment is removed, disinfecting your tank is key to killing bacteria and other harmful microorganisms. You can use an approved disinfectant or a mild bleach solution. Just follow the instructions on the product for the right dilution, and circulate it through the tank to sanitise the surfaces. Let it sit for the recommended time before flushing it out.
Using Water Tank Cleaning Tablets or Solutions
Tablets are an easy option for cleaning your tank without draining it. These tablets dissolve in the water and help remove contaminants, preventing further build-up. Just drop the recommended number of tablets in, let them dissolve, and circulate through the system to clean the tank’s interior.
Manual Scrubbing with Cleaning Brushes
For stubborn dirt stuck to the tank walls, a long-handled cleaning brush is helpful. You can scrub the surfaces without draining the water, making it ideal for removing algae, mould, or mineral deposits. Just make sure to use brushes that won’t damage the tank and can reach tricky areas.
By using these methods, you can keep your water tank clean and safe without the need to empty it, saving time and effort while ensuring your water quality remains top-notch.
Step-by-Step Guide to Cleaning Without Draining It Completely
Cleaning your domestic water tank without draining it completely is a straightforward yet essential process that can be done with the right tools and careful attention to detail. Here’s an in-depth, step-by-step guide to ensure your water tank is cleaned efficiently while keeping the water level intact.
Step 1: Preparation and Safety Measures
Before you begin cleaning, it’s crucial to take some preparatory steps to ensure safety and effectiveness.
- Turn off the water supply: Shut off the main water supply to prevent water from filling the tank during the cleaning process.
- Wear protective gear: Equip yourself with gloves, safety goggles, and long sleeves to protect yourself from chemicals and debris.
- Ventilate the area: Ensure that the space around the water tank is well-ventilated. If your tank is in an enclosed space, consider using a fan to promote airflow and reduce the risk of inhaling any harmful fumes.
- Prepare the necessary tools: You will need a submersible pump, siphoning hose, disinfectant (such as bleach or a specialised water tank cleaner), scrub brush, and a clean bucket for rinsing.
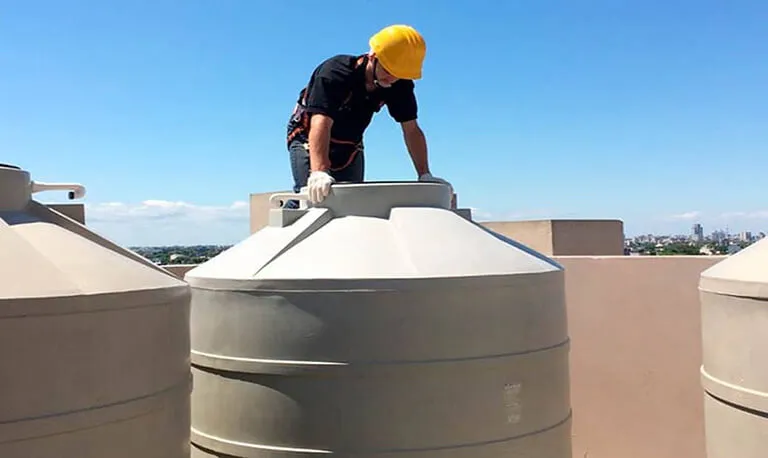
Step 2: Inspect the Tank
Before proceeding with the cleaning process, check the condition of the tank to identify any visible signs of damage, such as cracks, leaks, or sediment accumulation. Address any structural issues before you start, as cleaning a damaged tank may lead to further complications.
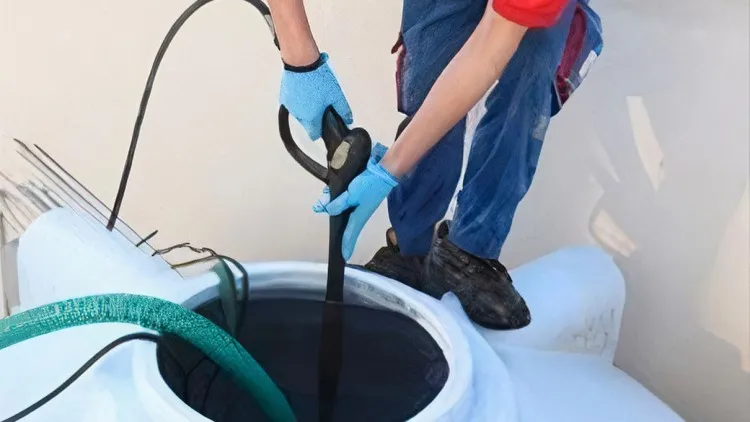
Step 3: Remove Sediment and Debris
Even without draining the water, it’s essential to remove sediment, dirt, and debris that may have accumulated at the bottom of the tank.
- Siphon out sediment: Use a siphoning hose to remove any heavy debris or sediment that has settled at the bottom of the tank. Place one end of the hose at the bottom and the other in a container or drain to extract the sediment. This helps ensure that the tank’s water remains cleaner and the cleaning solution will be more effective.
- Use a submersible pump: If there is more stubborn debris that cannot be siphoned out, you can use a submersible pump to remove it. The pump can help dislodge dirt and move it to a drain or storage container for disposal.
Step 4: Apply Disinfectant Solution
After removing debris and sediment, it’s time to disinfect the tank.
- Prepare the cleaning solution: Mix a safe disinfectant for water tanks, such as chlorine bleach or a specialised tank cleaner. Follow the manufacturer’s guidelines for the correct dilution ratio. Avoid using harsh chemicals that could leave harmful residues.
- Pour the solution into the tank: Carefully pour the cleaning solution into the tank. Ensure that the solution is evenly distributed across the inner surfaces of the tank. You can use a clean bucket to pour the solution or a pump to spray it evenly inside the tank.
- Allow the solution to sit: Let the disinfectant sit for a period recommended by the manufacturer, usually 30 minutes to 1 hour. This gives the solution enough time to break down algae, bacteria, and other contaminants.
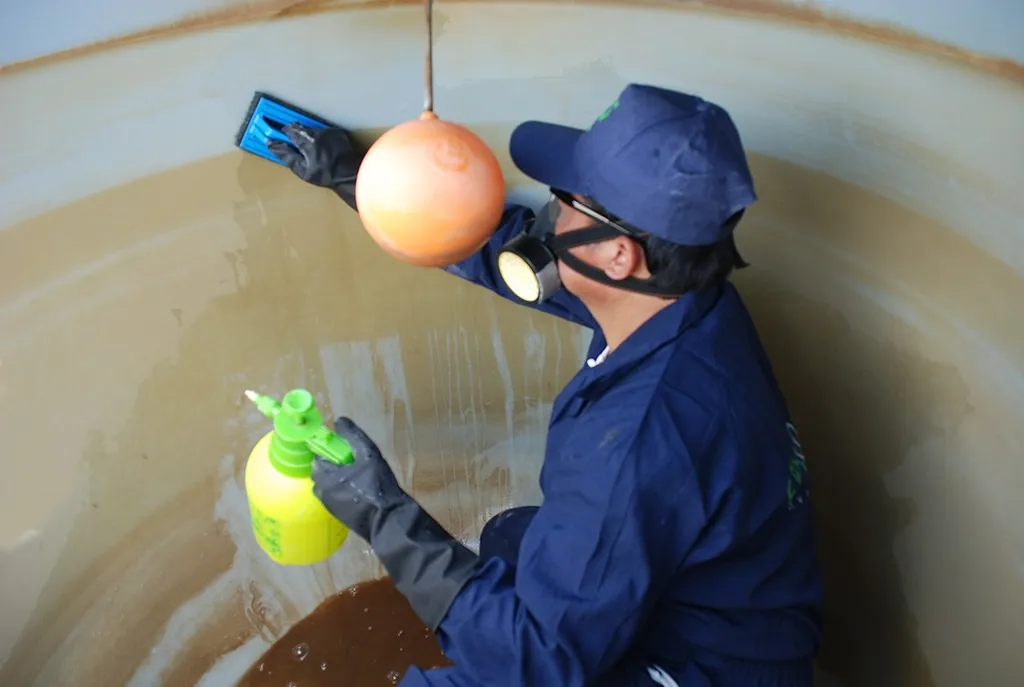
Step 5: Scrub the Tank
While the disinfectant solution is working, you can scrub the inner walls of the tank to loosen any stubborn grime or buildup.
- Use a long-handled scrub brush: Select a brush with a long handle to reach the walls and bottom of the tank. Scrub all areas, including corners, to remove any lingering dirt, algae, or biofilm that might be sticking to the surface.
- Focus on high-traffic areas: Pay extra attention to areas where the water flows in and out, as these tend to accumulate more deposits over time.
Step 6: Flush the Tank
Once the disinfectant has had enough time to sanitise the tank, it’s crucial to remove all traces of cleaning solution to ensure that your water remains safe for consumption.
- Flush the tank thoroughly: Open the water inlet and allow the tank to fill with fresh water. Let the water flow in, stirring up any remaining debris and residual cleaning solution. Use the siphon or a pump to extract any excess water and contaminants.
- Repeat flushing if necessary: If you notice that there is still residual cleaner or sediment, repeat the flushing process until the water runs clear and free from the cleaning solution. This step is crucial for maintaining water quality.
Step 7: Inspect and Final Clean
After flushing, inspect the tank to ensure there are no remaining contaminants.
- Check for any leftover sediment or cleaning solution: Look for any debris, especially in the corners or near the inlet/outlet valves. If any residue is still present, scrub those areas again with the brush and flush once more.
- Clean the inlet and outlet valves: Use a cloth or brush to wipe down the inlet and outlet pipes, as they can also accumulate sediment and germs over time. Ensure they are free from any blockages and contaminants.
Step 8: Refill and Reconnect the Water Supply
Once the tank is completely clean, it’s time to refill it and reconnect the water supply.
- Check for leaks: Before refilling the tank, check the connections and seals to ensure that no leaks are present.
- Refill the tank: Open the water supply valve and allow the tank to fill. Monitor the water level to make sure it doesn’t overfill. Keep an eye on the water’s clarity as it refills, ensuring no impurities are re-entering the tank.
- Test the water quality: After the tank is full, test the water for clarity, taste, and smell. If everything looks good, the tank is now ready for use.
Step 9: Regular Maintenance and Monitoring
To ensure the longevity of your water tank and maintain its cleanliness, establish a regular cleaning schedule. Additionally, monitor the water quality regularly to detect any early signs of contamination.
- Set reminders: Set reminders to clean the tank every 6-12 months to keep it in optimal condition.
- Keep the tank covered: Use a secure cover to prevent debris, insects, and dust from entering the tank between cleanings.
By following this detailed step-by-step guide, you can ensure that your domestic water tank remains clean and safe for use without the need to drain it completely. Regular maintenance will help preserve water quality and protect the health of those using it. Read more about the step-by-step process of cleaning and disinfection.
Safety Precautions During the Cleaning Process
Cleaning your domestic water tank is crucial to maintaining water quality, but it’s equally important to follow safety measures to protect yourself and your property. Here are key safety precautions to consider when cleaning your water tank without draining it completely:
1. Wear Protective Gear
Before you start cleaning, make sure you wear appropriate protective gear to safeguard yourself from chemicals and contaminants:
- Gloves: Rubber or latex gloves are essential to protect your hands from cleaning agents, dirt, and bacteria.
- Safety Goggles: Protect your eyes from splashes of cleaning solution or debris.
- Long Sleeves and Pants: Wearing long sleeves and pants helps protect your skin from direct contact with water, disinfectants, and any contaminants.
2. Ensure Proper Ventilation
Water tanks, especially those in confined spaces, may harbour harmful fumes from chemicals or bacteria. Ensure proper ventilation by opening windows and doors or using a fan to maintain airflow and prevent the buildup of harmful gases.
3. Use Only Approved Disinfectants
Choose disinfectants or cleaning solutions that are safe for use in water tanks. Avoid harsh chemicals that could contaminate the water or damage your plumbing system. Always follow the manufacturer’s guidelines for dilution to ensure the solution is effective and safe.
4. Avoid Overfilling the Tank with Cleaning Solution
Do not overfill the tank with disinfectants or cleaning solutions. Too much cleaning solution can make it harder to flush out the chemicals later, leaving residue that may affect water quality. Stick to the recommended amounts per the instructions.
5. Be Cautious of Electrical Components
If your water tank has electrical components (such as a pump), ensure that the power supply is turned off before starting the cleaning. Water and electricity don’t mix, so turning off electrical connections reduces the risk of electric shock or damage to the system.
6. Handle Equipment with Care
When using equipment such as siphoning hoses, submersible vacuums, or cleaning brushes, handle them with care. Make sure hoses are securely attached to prevent disconnections and avoid damaging the tank walls or internal components.
7. Avoid Direct Contact with Contaminated Water
During the cleaning process, avoid direct contact with the tank water as it may contain bacteria, algae, or other harmful contaminants. Always wear gloves if you need to handle the water, and wash your hands thoroughly afterwards.
8. Monitor Tank Structural Integrity
Inspect the tank for any cracks, leaks, or damage before starting the cleaning. If you notice any issues, it’s important to fix them before proceeding. A damaged tank could leak cleaning solution or water, causing property damage or health risks.
9. Flush Thoroughly After Cleaning
After disinfecting, make sure to flush the tank thoroughly to remove any remaining cleaning solution. Incomplete flushing can leave harmful chemicals in the tank, compromising water quality and potentially causing health issues.
10. Keep Children and Pets Away
To ensure safety, keep children and pets away from the cleaning area. They might be curious about the process but could accidentally come into contact with harmful chemicals or equipment. Make sure the area is secure and off-limits during the cleaning.
By following these safety precautions, you can clean your water tank efficiently while minimising risks to your health and maintaining the integrity of your water system.
Maintaining Water Quality Post-Cleaning
After cleaning your domestic water tank, it’s essential to take proactive measures to maintain water quality and prevent future contamination. Regular maintenance and mindful practices will help keep your water fresh and safe for consumption. Here’s how you can ensure water quality is maintained after the cleaning process:
1. Regular Inspections
Check your water tank every few months for signs of contamination, such as cloudiness or an unpleasant odour. Inspect the tank for leaks, cracks, or any buildup inside. Early detection of potential issues can help prevent contamination from spreading.
2. Use a Tank Cover
Make sure your water tank is properly covered to prevent dust, debris, and insects from contaminating the water. A secure, tight-fitting cover will keep contaminants out, helping to maintain the cleanliness of the water. Ensure the cover is in good condition, with no holes or gaps.
3. Monitor Water Quality Regularly
Consider installing a water quality monitoring system to track changes in the water’s pH, turbidity, and bacterial content. This system can alert you to any issues that might arise, allowing you to address them promptly before they affect your water supply.
4. Avoid Direct Contamination
Be mindful of how the water is used. Avoid letting non-potable substances (like cleaning chemicals or oils) enter the tank. Also, ensure that the external plumbing connections are secure and well-maintained to prevent contaminants from entering the tank.
5. Clean Filters and Pipes Regularly
To prevent bacteria and dirt from circulating into the water, clean the filters and pipes regularly. Check the filtration system, replace old filters, and clear any blockages in the pipes to maintain water quality. This is particularly important if you use a water purification or softening system.
6. Check for Sediment Build-Up
Sediment and minerals can accumulate at the bottom of the tank over time, even after cleaning. Use water treatment solutions like water softeners to reduce mineral buildup. Periodically check and remove any sediment to keep the water clear and fresh.
7. Use Safe Water Treatment Solutions
If. If you live in an area with hard water or water quality concerns, consider installing a safe water treatment system. Options like UV purifiers, reverse osmosis, or water conditioning agents can help ensure your water stays safe. Consult with a professional to find the best solution for your needs.
8. Maintain Proper Ventilation
Ensure the area around the water tank is well-ventilated to prevent mould, algae, or bacteria growth. Poor ventilation creates an environment where microorganisms can thrive. A well-ventilated space will help keep your tank clean and free from harmful contaminants.
9. Be Mindful of Tank Placement
Place your water tank in a shaded or cool area to prevent excessive heat that encourages microbial growth. Avoid direct sunlight, as it can warm the water, making it easier for algae and bacteria to proliferate.
10. Regular Tank Cleaning Schedule
Establish a regular cleaning schedule, ideally every 6 to 12 months, depending on the tank’s usage and environmental factors like temperature and dust. Regular cleaning helps ensure your water supply stays fresh and safe throughout the year.
By following these simple but effective practices, you can keep your water clean and safe for long-term use. Maintaining water quality is an ongoing effort, but with consistent care, your domestic water system will remain in optimal condition. Read more about some unique ways to clean water tanks.
Conclusion
Cleaning your domestic water tank without draining it completely is a practical and efficient method to maintain clean and safe water for your home. By following proper cleaning techniques, taking the necessary safety precautions, and ensuring water quality post-cleaning, you can keep your water system in optimal condition. Regular maintenance, such as inspecting the tank, using appropriate cleaning agents, and monitoring water quality, is essential in preventing contamination and extending the lifespan of your water tank. By incorporating these steps into your routine, you can enjoy a continuous supply of fresh, clean water while also safeguarding your family’s health.