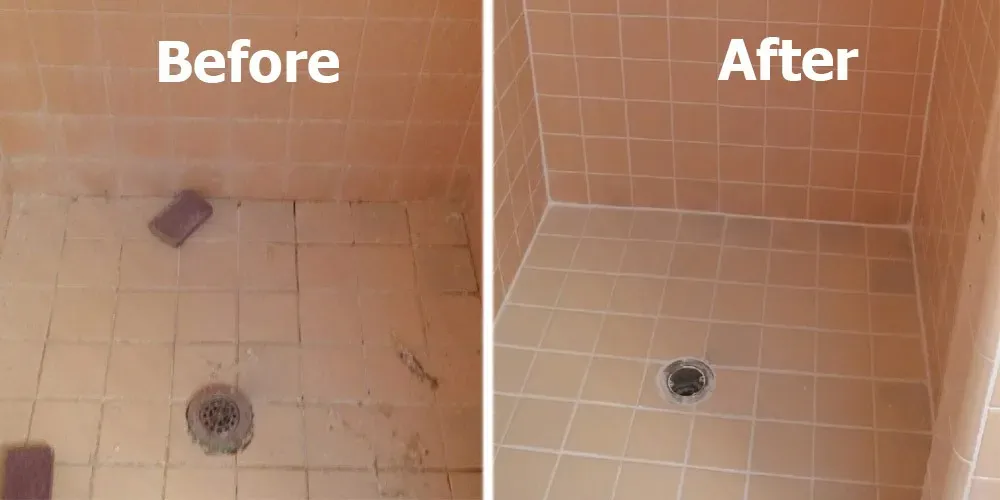
Bathrooms face constant wear, with shower grout often cracking, staining, or leaking over time. In Dubai’s humid climate, this can quickly lead to mold and water damage. Regrouting and sealing restores appearance, prevents leaks, and ensures long-lasting hygiene. This guide covers the tools, techniques, and expert solutions from experts to keep your shower clean, safe, and durable.
Understanding Grout and Sealants
What is Grout?
Grout is a cement-like material used to fill the gaps between tiles. It strengthens the tile installation, prevents tiles from shifting, and keeps moisture out.
What is Sealant?
Sealant, often silicone-based, is applied to corners, edges, and joints to create a watertight barrier. It protects tiles from moisture penetration, mold, and mildew.
Why Regrouting and Sealing is Important
- Prevents water seepage behind tiles
- Stops mold and mildew formation
- Maintains the structural integrity of tiles
- Enhances the bathroom’s aesthetic appeal
Signs Your Shower Needs Regrouting and Sealing
Recognizing the signs early helps prevent costly repairs.
| Sign | What it Indicates |
| Cracked or crumbling grout | Loss of adhesion and protection |
| Discolored grout | Mold, mildew, or dirt accumulation |
| Loose tiles | Moisture penetration weakening the bond |
| Water seepage | Seals may have worn off or failed |
| Musty odor | Mold or mildew behind tiles |
Tools and Materials Needed
| Tool/Material | Purpose |
| Grout removal tool or utility knife | Remove old grout |
| Vacuum or brush | Clean debris |
| New grout (epoxy or cement-based) | Fill gaps between tiles |
| Grout float | Apply grout evenly |
| Sponge | Wipe off excess grout |
| Sealant (silicone) | Waterproof edges and corners |
| Caulking gun | Apply sealant precisely |
| Gloves and mask | Safety protection |
| Bucket and water | Cleaning and mixing |
Step-by-Step Guide: How to Regrout a Shower
Step 1: Remove Old Grout
Use a grout removal tool or utility knife to carefully scrape out old grout. Avoid damaging the surrounding tiles. Vacuum or brush the debris away to create a clean surface.
Step 2: Clean the Tiles
Before applying new grout, clean tiles thoroughly with warm water and mild detergent. Make sure the gaps are free from dust, soap scum, and mold.
Step 3: Mix New Grout
Follow the manufacturer’s instructions to mix your chosen grout. Epoxy grout is more durable and stain-resistant, while cement-based grout is easier for DIY applications.
Step 4: Apply the Grout
Use a grout float to push grout into the gaps, ensuring all spaces are filled. Hold the float at a 45-degree angle to remove excess grout from the tile surface.
Step 5: Wipe Off Excess Grout
After the grout starts to set (per product instructions), use a damp sponge to wipe off excess grout, being careful not to remove it from the gaps.
Step 6: Allow Grout to Cure
Let the grout cure as per manufacturer instructions (usually 24 – 72 hours). Avoid using the shower during this period.
Step-by-Step Guide: How to Seal a Shower
Step 1: Choose the Right Sealant
Use a high-quality silicone sealant that is mold- and mildew-resistant. For professional results, consider products recommended by experts.
Step 2: Prepare the Surface
Ensure all corners, joints, and edges are clean, dry, and free of old sealant. Use a utility knife to remove any remnants.
Step 3: Apply the Sealant
Using a caulking gun, apply sealant evenly along corners, edges, and joints. Use a smoothing tool or finger dipped in water to flatten and shape the bead.
Step 4: Allow Sealant to Cure
Follow manufacturer instructions for curing times (usually 24 hours). Avoid water contact during this period.
Tips for a Long-Lasting Grout and Seal
- Use Epoxy Grout in High-Moisture Areas: More durable and resistant to stains.
- Ventilate the Bathroom: Proper airflow reduces mold growth.
- Regular Cleaning: Use mild, non-abrasive cleaners to prevent mold.
- Inspect Annually: Check grout and sealant for cracks or discoloration.
- Avoid Harsh Chemicals: Bleach and acidic cleaners can damage grout.
Common Mistakes to Avoid
- Applying grout over wet or dirty tiles
- Skipping sealing of edges and corners
- Using incorrect sealant for high-moisture areas
- Not allowing proper curing time
- Rushing the cleaning process, which leads to uneven grout
Preventive Measures for Dubai Homes
Dubai’s humid climate and frequent water usage in bathrooms make preventive measures essential:
| Measure | Benefit |
| Dehumidifiers or exhaust fans | Reduce moisture levels |
| Regular grout cleaning | Prevent mold and mildew buildup |
| Promptly fixing leaks | Prevent water seepage behind tiles |
| Using mold-resistant grout | Minimize future mold issues |
| Professional inspection | Ensure long-term durability |
DIY vs Professional Regrouting
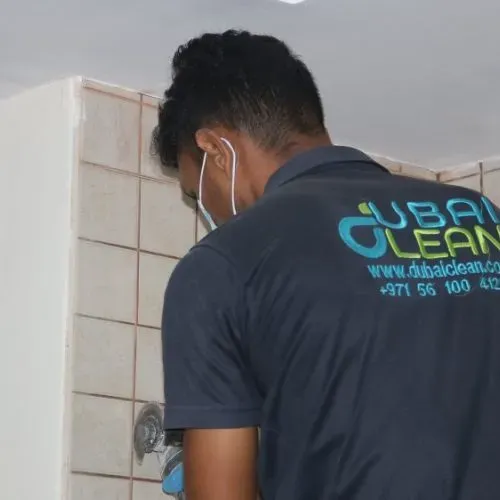
While DIY regrouting and sealing can be cost-effective for minor issues, professional services are recommended for:
- Large bathrooms with extensive tile areas
- Severe mold or water damage
- Uneven tile surfaces requiring expert leveling
Professional teams ensure perfect grout lines, watertight seals, and mold-resistant finishes, making your shower long-lasting and hygienic.
FAQs
Conclusion
Regrouting and sealing your shower ensures hygiene, prevents leaks, and keeps your bathroom looking fresh in Dubai’s humid climate. Clean grout and watertight seals reduce mold, extend durability, and maintain comfort for your family. For professional results, trust expert regrouting and sealing services, ensuring a safe, stylish, and long-lasting shower.