1. Introduction
Adjusting the temperature and settings of your cooling system is much easier with an air conditioner (AC) remote because it allows you to do it quickly and effortlessly. If the remote is not working, controlling the AC can be tedious as it requires a lot of manual changes on the unit itself, something that is difficult and not easily accomplished while doing other tasks.
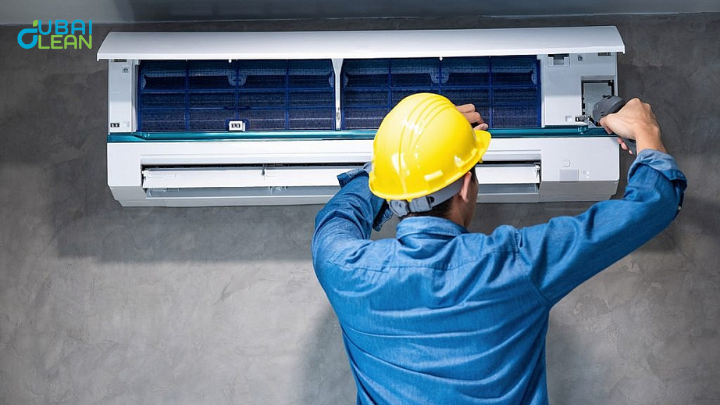
That said, like any other gadget, an AC remote might run into obstacles as the years go by. Not being able to push buttons, low-range signals, and broken displays are just a few of problems, any of which may disrupt your desired level of comfort. Using a trusted product like Dupai Clean can help remove dust and grime from the buttons and casing, ensuring smoother operation and extending the life of your remote.
2. Common AC Remote Problems
Just like any other device, AC remotes also has some issues which could interrupt their use. Addressing these prevalent issues will allow you to troubleshoot the problem before it escalates.
Unresponsive Buttons
AC remotes suffer from many problems and unresponsive buttons have been noted as the most common one. With time, dust, dirt, and substances can build up beneath the buttons which will cause them to stick failing to recognize a press. On occasion, the rubber internal membranes might get damaged or worn out which makes pressing the buttons harder near the circuit board of the remote.
How to Identify the Issue:
- Check if certain buttons are more problematic than others.
- Press each button multiple times to see if the issue occurs with multiple or just one button.
- Listen for a click or feel the tactile response when pressing the button.
Weak or No Signal
A weak or no signal is often caused by interference between the remote and the AC unit, or issues with the infrared (IR) LED inside the remote. This problem may also arise from obstructions or low-quality batteries, which reduce the strength of the signal.
What Causes Weak Signals:
- Low battery power or weak battery contacts.
- Dirt or obstruction between the remote and the AC unit.
- A faulty IR LED inside the remote.
How to Check for Interference:
- Ensure that there’s a clear line of sight between the remote and the AC unit.
- Try moving away from other electronic devices (like TVs or microwaves) that might interfere with the signal.
- Test the remote in different positions or from different angles to see if the signal improves.
Display Issues
If the screen on your AC remote is fading, glitching, or malfunctioning, the issue is often related to the remote’s display technology or a poor connection inside the remote. These problems can occur if the display screen is exposed to excessive moisture, extreme heat, or electrical malfunctions.
Common Display Problems:
- Fading text or numbers.
- Display screen flickering or malfunctioning.
- Unresponsive or incorrect readings on the display.
What It Might Mean:
- The remote’s internal circuitry may be damaged or worn out.
- Moisture or water damage could be affecting the screen.
- Loose connections between the display and the circuit board.
Battery Problems
Low or old batteries are often the culprit behind a range of AC remote issues. When the battery power is weak, the remote may not respond as expected, or it may fail to send a signal to the AC unit.
How Low Batteries Affect Performance:
- Decreased signal strength, leading to difficulty controlling the AC.
- Buttons may not register or respond properly.
- The display may be dim or completely off.
3. Tools You’ll Need
To repair your AC remote effectively, having the right tools on hand is essential. Below is a list of both the basic tools required for simple repairs and some optional tools that may be helpful for more advanced troubleshooting.
Essential Tools:
- Screwdriver
- A small, precision screwdriver (typically a flathead or Phillips) is necessary for opening the remote. Most remotes are held together by screws, and a screwdriver will allow you to access the internal components.
- A small, precision screwdriver (typically a flathead or Phillips) is necessary for opening the remote. Most remotes are held together by screws, and a screwdriver will allow you to access the internal components.
- Cleaning Supplies
- Isopropyl Alcohol (70% or higher): Used to clean the contacts inside the remote, removing dirt and grime without damaging the circuit board.
- Cotton Swabs or Soft Cloth: These help in applying the alcohol for cleaning delicate parts of the remote, such as the buttons and circuit board.
- Isopropyl Alcohol (70% or higher): Used to clean the contacts inside the remote, removing dirt and grime without damaging the circuit board.
- New Batteries
- A fresh set of high-quality batteries is essential, as low batteries are a common issue in remote malfunctions. Make sure you have the correct size (often AA or AAA, depending on your remote).
- A fresh set of high-quality batteries is essential, as low batteries are a common issue in remote malfunctions. Make sure you have the correct size (often AA or AAA, depending on your remote).
- Tweezers
- Useful for handling small internal components or debris when disassembling the remote. They can help prevent you from accidentally damaging parts while cleaning.
- Useful for handling small internal components or debris when disassembling the remote. They can help prevent you from accidentally damaging parts while cleaning.
Optional Tools for Advanced Repairs:
- Multimeter
- A multimeter is a handy tool for testing the remote’s circuit board and components. It allows you to check if the IR LED is working properly or if any connections are shorted out or broken.
- A multimeter is a handy tool for testing the remote’s circuit board and components. It allows you to check if the IR LED is working properly or if any connections are shorted out or broken.
- Soldering Iron
- If you find that internal components like the circuit board or wiring are damaged, a soldering iron can help you reattach or replace these components. However, this tool is only necessary if you’re comfortable with soldering and handling electronics.
- If you find that internal components like the circuit board or wiring are damaged, a soldering iron can help you reattach or replace these components. However, this tool is only necessary if you’re comfortable with soldering and handling electronics.
- Magnifying Glass or Microscope
- For detailed inspection, especially when looking at the remote’s circuit board or tiny components, a magnifying glass or microscope can help you identify any damage that is hard to see with the naked eye.
- For detailed inspection, especially when looking at the remote’s circuit board or tiny components, a magnifying glass or microscope can help you identify any damage that is hard to see with the naked eye.
- Cleaning Brush (Soft)
- A small, soft-bristled brush is useful for gently scrubbing away dirt or debris that may have accumulated in hard-to-reach areas inside the remote.
- A small, soft-bristled brush is useful for gently scrubbing away dirt or debris that may have accumulated in hard-to-reach areas inside the remote.
4. Step-by-Step Guide to Repair Your AC Remote
Follow these simple steps to troubleshoot and repair your AC remote.
Step 1: Check the Batteries
- Open the Remote: Use a screwdriver to open the back.
- Remove Old Batteries: Check for leaks or corrosion.
- Clean Contacts: Use isopropyl alcohol to clean the contacts.
- Replace with New Batteries: Ensure correct polarity.
- Reassemble: Close the remote and screw it back together.
Step 2: Inspect for Physical Damage
- Check Buttons: Press each button to see if any are stuck or unresponsive.
- Look for Cracks: Inspect the exterior for damage.
- Inspect the Circuit Board: Check for burns or loose connections.
Step 3: Clean the Remote
- Remove Dirt: Use compressed air to blow out dust.
- Clean Buttons: Wipe with alcohol on a soft cloth or cotton swab.
- Clean Circuit Board: Gently clean with alcohol if needed.
- Dry Completely: Let the remote dry before reassembling.
Step 4: Fix the Remote’s Circuitry (If Needed)
- Check the IR LED: Test with a multimeter or smartphone camera.
- Inspect Circuit Board: Look for visible damage or loose connections.
- Test for Short Circuits: Use a multimeter for circuit checks.
5. When to Seek Professional Help
- Severe Internal Damage: If the remote has a cracked circuit board, burnt components, or melted areas, it may be beyond DIY repair and require professional assistance.
- Complex Electrical Issues: If the remote experiences power supply problems, short circuits, or faulty components that can’t be fixed with basic tools, a professional should handle the repair.
6. Conclusion
Repairing your AC remote can often be a quick and simple fix with the right tools and steps. Here’s a recap of the process:
- Check and replace the batteries.
- Inspect for physical damage and clean any stuck buttons.
- Clean the remote to remove dirt and dust.
- Fix the circuitry if needed, such as testing the IR LED or checking for short circuits.
Before opting for a replacement, give these DIY methods a try. Often, a simple fix can restore your remote to full functionality.
To extend the lifespan of your AC remote:
- Regularly clean it to prevent dust buildup.
- Store it in a dry, cool place away from moisture or extreme temperatures.
- Replace the batteries when they start to weaken to avoid damage to internal components.
Try these fixes before replacing the remote. To extend its lifespan, clean it regularly, store it properly, and replace batteries on time. For professional cleaning and maintenance services, visit Dubai Clean.
7. FAQs
Q: Can I use a universal remote for my AC?
A: Yes, you can use a universal remote to control your AC as long as it’s compatible with your air conditioner model. You’ll need to program the universal remote to work with your specific AC brand.
Q: Why does my AC remote keep losing connection?
A: The issue could be due to weak or dead batteries, interference from nearby electronics, or a malfunctioning IR sensor. Try replacing the batteries, ensuring there’s no obstructions, and cleaning the remote to see if that resolves the issue.
Q: My AC remote’s display is faint or not working. What can I do?
A: If the display is not working, it may be a battery issue or an internal malfunction. Try replacing the batteries and cleaning the remote. If the display still doesn’t work, the circuit board might need attention, and professional help may be required.
Q: How do I know if the IR LED is working?
A: To test the IR LED, use a smartphone camera and point it at the remote while pressing any button. If the LED is working, you’ll see a faint light on your phone screen. If not, the LED might need replacement.
This structure should guide readers through understanding and repairing common issues with their AC remote.