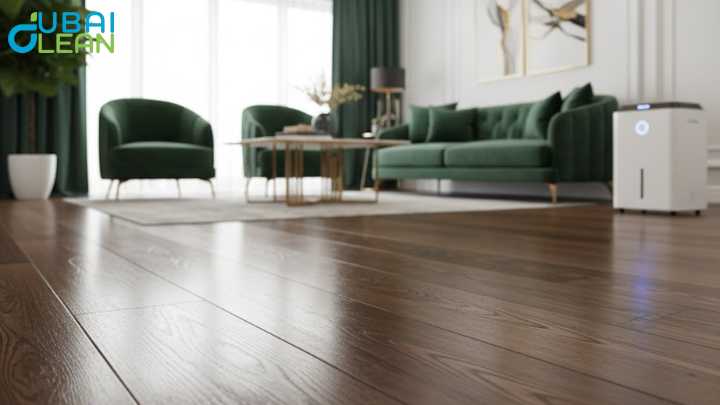
Ever felt trapped by outdated window moldings that make your space feel cluttered or dim? Removing these moldings can breathe new life into a room, instantly making it feel more spacious, bright, and modern. Outdated trim can weigh down your interior style, making even well-decorated spaces feel heavy or confined. By taking a few simple steps to remove them, you can transform the atmosphere of your home with minimal effort.
Beyond aesthetics, this small home improvement task can also improve your productivity. Allowing more natural light into your workspace boosts mood, focus, and energy levels throughout the day. In this guide, we’ll walk you through how window molding removal can enhance both the look and functionality of your home, helping you create a fresh, inspiring environment that feels open and welcoming
1. Why Removing Window Molding Matters
Hiring professional window cleaning services in Dubai is more than just a cosmetic upgrade it can transform both the look and feel of your home or office. Dirty or streaked windows often make rooms feel darker, smaller, and less inviting. By letting experts handle the cleaning, your windows become crystal clear, allowing more natural light to flood your space and creating a sense of openness. This simple service can have a big impact on your environment, enhancing both aesthetics and functionality.
Boost Productivity Through Space Optimization
Natural light is key for enhancing mood, focus, and energy throughout the day. By removing heavy moldings, sunlight can flood your room, creating a brighter and more uplifting atmosphere. Cleaner window lines also reduce visual clutter, which helps you concentrate better. Many homeowners notice that their home offices or creative spaces feel larger and more motivating after the moldings are gone.
Aesthetic Benefits of Modern Window Design
Old or ornate moldings can make even stylish rooms feel dated or heavy. Removing them provides a blank canvas for modern trims, sleek finishes, or minimalist design upgrades. The emotional reward is immediate you’ll enjoy the satisfaction of a room that feels fresh, open, and perfectly aligned with your personal style. This simple change can dramatically elevate your home’s overall aesthetic.
2. Essential Tools for Removing Window Moldings
Having the right tools is essential for a smooth and safe window molding removal process. Using proper equipment not only makes the job easier but also reduces the risk of damaging your walls or windows. Preparing everything in advance ensures you can work efficiently and confidently, minimizing frustration and unexpected setbacks. With the correct tools, even a DIY beginner can achieve professional-looking results while keeping safety a priority.
Basic Tools for Removal
You’ll need a crowbar or pry bar, a utility knife, and a hammer to remove moldings effectively. These tools help lift and detach the trim without causing cracks or splintering. Using the right equipment makes the removal process faster and more controlled.
Safety Gear and Optional Tools
Gloves and goggles are essential to protect your hands and eyes from sharp edges or flying debris. For painted moldings, a heat gun can soften paint and caulk, making the removal smoother and reducing the chance of wall damage. Preparing safety gear ahead of time ensures a secure and stress-free project.
3. Step-by-Step Guide to Removing Window Molding
Removing window moldings might seem daunting, but with careful planning and patience, it can be a straightforward DIY project. Following a systematic approach ensures your walls and windows remain intact while giving you a clean canvas for updates. Taking your time at each stage not only improves the final results but also makes the process safer and more enjoyable.
Prepare Your Space
Start by clearing the area around your windows. Remove curtains, blinds, and any nearby furniture to prevent damage or interference. Lay down a drop cloth to protect your floors from dust, debris, or accidental scratches. Proper preparation creates a comfortable workspace and minimizes stress during the project.
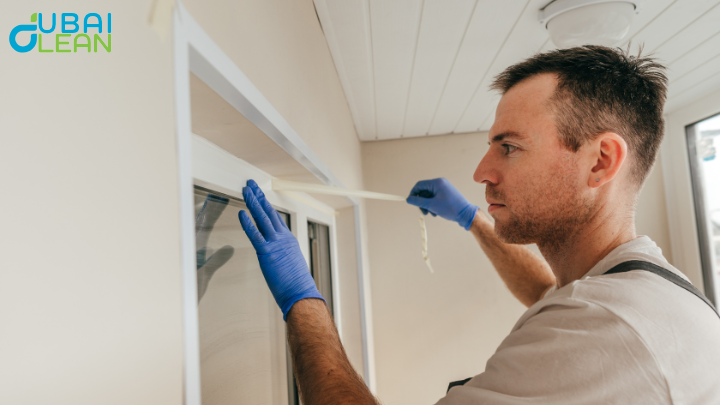
Score the Edges
Use a utility knife to carefully cut through caulk and paint along the edges of the molding. This prevents the walls from peeling or cracking when you begin prying. Taking this step slowly ensures a smoother removal process and helps maintain the integrity of your wall surfaces.
Gently Pry the Molding
Begin at one corner and slowly lift the molding with a pry bar or crowbar. Move along the length in small increments to avoid splintering or damaging the wall. Patience is crucial at this stage, as rushing can result in broken trim or additional repairs.
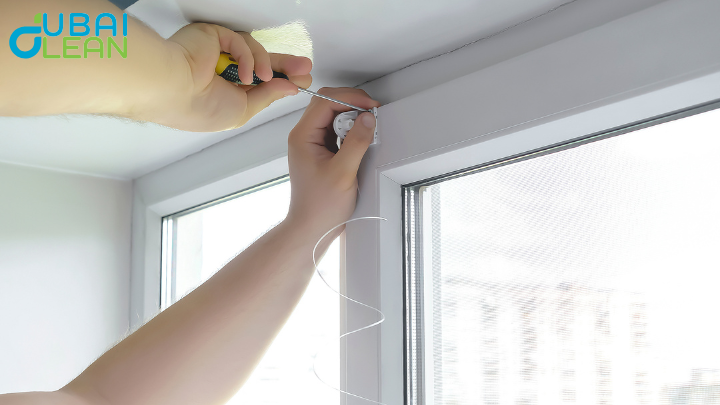
Remove Residual Nails or Adhesive
After the molding is detached, use a hammer or nail puller to remove any leftover nails. Sanding or scraping off adhesive residue ensures a smooth surface. Cleaning up thoroughly prepares your walls for painting, refinishing, or installing new trims.
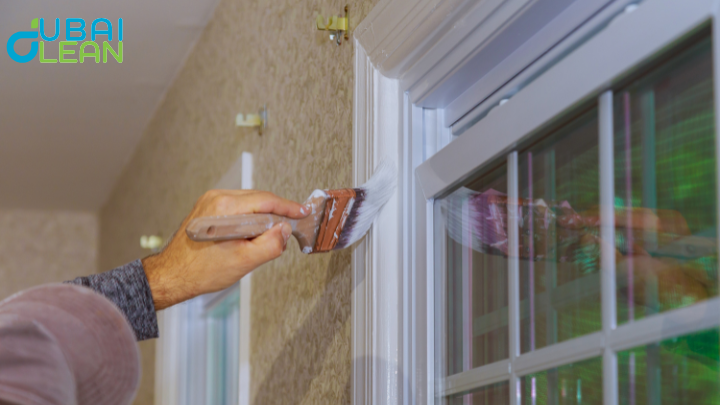
Clean and Prep for Next Steps
Wipe down the window area and patch any minor holes or imperfections. Smooth surfaces are key for achieving a polished and professional-looking finish. Completing this prep work properly makes decorating or adding new trim easier and visually appealing.
4. Tips for a Seamless, Safe Process
Taking your time and following safety precautions is key to a smooth window molding removal project. Rushing can lead to wall damage, splintered trim, or even personal injury. By working methodically and preparing in advance, you can avoid common mistakes while enjoying a more satisfying DIY experience. These tips will help you complete the task efficiently and safely.
Work Slowly and Methodically
Move carefully when prying off moldings to prevent cracks or splinters. Tackling the project step by step ensures the walls and trim remain intact. Patience during each stage makes the overall process less stressful and more successful.
Get a Helper for Larger Windows
For bigger windows, an extra pair of hands can make removal much easier. A helper can support the molding while you pry, reducing the risk of breakage. Working together also speeds up the process and adds a sense of teamwork to your project.
Prioritize Safety Gear
Always wear gloves and goggles to protect yourself from sharp edges, nails, or flying debris. Safety gear prevents injuries and allows you to focus on the task with confidence. Small precautions go a long way in making the project safer and more enjoyable.
Celebrate Small Victories
Notice your progress as you remove each section carefully. Successfully lifting a stubborn corner or finishing a window without damage can be very rewarding. These little achievements make the transformation of your space even more satisfying.
5. After Removal: Boosting Productivity & Aesthetics
Once the window moldings are removed, your space can feel instantly brighter, cleaner, and more open. The change doesn’t just improve aesthetics it also enhances functionality by letting in more natural light, which can boost mood and productivity. This is the perfect opportunity to rethink your window design and create an environment that is both stylish and efficient.
Reimagine Your Window Space
With the moldings gone, your windows become the focal point of the room. You can add sleek new trims, modern blinds, or stylish curtains to enhance both functionality and design. More natural light brightens the space and creates an uplifting atmosphere, improving energy and focus throughout the day.
Decor and Design Ideas
Opt for minimalist finishes to maintain a clean and airy feel around your windows. Neutral tones and light colors promote calmness and concentration, making them ideal for home offices or creative areas. Adding personal touches like plants, artwork, or decorative accents enhances the emotional satisfaction of a freshly updated environment.
6. Common Mistakes to Avoid
Even a simple DIY project like removing window moldings can go wrong if you’re not careful. Many homeowners make avoidable mistakes that lead to wall damage, broken trim, or unnecessary frustration. By understanding common pitfalls and taking precautions, you can complete the project efficiently and safely. Planning ahead and working patiently ensures a smooth process and professional-looking results.
Rushing the Process
Trying to remove moldings too quickly often results in cracked walls or splintered trim. Slow, methodical work protects both your walls and the molding, reducing the need for repairs. Patience is key to achieving a clean and polished finish.
Using Improper Tools
Using the wrong tools can make the job harder, risk personal injury, and damage your windows or walls. Ensure you have a pry bar, utility knife, hammer, and appropriate safety gear before starting. Proper tools make the removal process smoother and safer.
Neglecting to Prepare the Space
Failing to clear furniture, remove blinds, or protect floors can lead to messes and extra cleanup. Preparing your workspace in advance prevents damage and makes the project more enjoyable. A well-prepared area allows you to focus on the removal process efficiently.
Final Thoughts
Removing window moldings is more than just a DIY task it’s a way to enhance both the look and functionality of your home. By letting in more natural light and creating cleaner lines, you can instantly refresh any space. The process opens up opportunities for modern trims, décor updates, or minimalist finishes that elevate your interior style. Small changes like this can make a big impact on how your home feels every day.
Taking the time to remove and prep your windows carefully ensures a polished, professional-looking result. Beyond aesthetics, the brighter, open environment can boost productivity and improve your overall mood. Embrace the transformation and enjoy the satisfaction that comes from creating a space that is brighter, more inviting, and perfectly suited to your lifestyle.