Are you looking to transform your Dubai home with wallpaper? Learning how to install wallpaper like a pro isn’t as difficult as it seems. With the right tools, proper preparation, and our expert guidance, you can achieve professional-quality results in your own home. This comprehensive guide breaks down the entire process into manageable steps specifically tailored for Dubai’s climate and building conditions.
What You’ll Need: Essential Tools for Wallpaper Installation
Before starting your wallpaper project, gather these tools and materials:
| Basic Tools | Optional Tools | Materials |
|---|---|---|
| Measuring tape | Seam roller | Wallpaper of choice |
| Pencil | Smoothing brush | Wallpaper adhesive |
| Level | Drop cloths | Primer (if needed) |
| Utility knife | Extension pole | Sponges for cleanup |
| Straight edge | Steamer (for removal) | Bucket |
| Scissors | Laser level | Towels |
| Wallpaper smoother | Work table | Sandpaper |
| Plumb line | Wall filler |
Preparing Your Space: The Foundation of Professional Results
Assess and Clean Your Walls
Starting with clean, smooth walls is non-negotiable for professional wallpaper installation. Dubai’s humidity and dust make this step especially important.
- Remove all wall fixtures, outlet covers, and switch plates
- Fill any holes with spackling compound
- Sand rough areas until smooth
- Wipe down all surfaces with a damp cloth
- Allow the walls to dry completely
Wall Preparation Tips for Dubai’s Climate
The high humidity in Dubai presents specific challenges for wallpaper installation. Take these extra steps:
- Apply a mold-resistant primer if your walls show any signs of moisture issues
- Plan your installation for early morning or evening when humidity levels are lower
- Use an air conditioner to maintain consistent temperature during installation
- Check weather forecasts – avoid extremely humid days for better adhesion
Taking Measurements and Planning Your Layout
Measuring Your Space
Accurate measurements prevent waste and help you plan the project properly:
- Measure wall height from baseboard to ceiling
- Measure wall width at three points (top, middle, bottom)
- Use the largest measurements when calculating wallpaper needs
- Add 4-6 inches to your height measurement for the trimming allowance
Creating an Effective Layout Plan
Plan your wallpaper layout before cutting any material:
- Decide where your first panel will go (typically beside a door or window)
- Use a level and plumb line to mark vertical guidelines
- For patterned wallpaper, plan how patterns will align at seams
- Consider focal points in the room where patterns should be centered
Step-by-Step Wallpaper Installation Process
Step 1: Cutting Your Wallpaper
Precision cutting sets professionals apart from amateurs:
- Measure and mark your wallpaper according to wall height plus 4-6 inches
- Use sharp scissors or a utility knife with a straight edge
- Cut multiple panels at once if your pattern requires alignment
- Number panels lightly on the back to track installation order
Step 2: Applying Adhesive
Different wallpapers require different adhesion methods:
Pre-Pasted Wallpaper
- Fill your water tray with clean, room temperature water
- Roll each panel through water, paste side down
- Book the wallpaper by folding it adhesive side to adhesive side
- Let it rest for the manufacturer’s recommended time (usually 3-5 minutes)
Non-Pasted Wallpaper
- Apply adhesive directly to the wall for non-woven wallpaper
- Apply adhesive to the wallpaper for traditional paper wallpaper
- Use a paint roller for an even application
- Follow manufacturer’s instructions for drying time
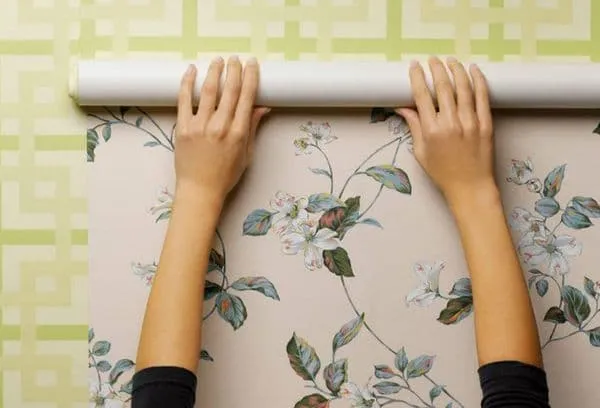
Step 3: Hanging Your First Panel
The first panel sets the standard for your entire project:
- Position your panel along your plumb line
- Allow extra material at the top and bottom for trimming
- Press the panel to the wall using a wallpaper smoother
- Work from the center outward to remove air bubbles
- Use light, sweeping motions rather than heavy pressure
Step 4: Matching Seams and Continuing Installation
Creating seamless connections between panels:
- Position the second panel, carefully matching patterns
- Butt edges together without overlapping
- Use a seam roller to secure edges
- Wipe away excess adhesive with a clean, damp sponge
- Continue around the room, checking the plumb line frequently
Step 5: Trimming Excess Material
Clean edges make your work look professional:
- Use a straight edge as a guide against trim, baseboards, and ceilings
- Cut with a sharp utility knife
- Change blades frequently for clean cuts
- Make multiple light passes rather than one heavy cut
Handling Tricky Areas Like a Pro
Wallpapering Around Windows and Doors
- Hang wallpaper normally until you reach the obstacle
- Cut diagonal slits at corners to allow paper to lay flat
- Smooth paper against frame edges
- Trim excess paper with a utility knife and straight edge
Managing Electrical Outlets and Light Switches
- Turn off electricity to all outlets and switches in the work area
- Remove cover plates before beginning
- Hang wallpaper over outlets, marking their positions
- Cut an X over outlets, fold paper back, and trim excess
- Replace cover plates once the wallpaper is dry
Common Problems and Solutions
| Problem | Cause | Solution |
|---|---|---|
| Bubbles | Air trapped under paper | Pierce small bubbles with a pin and smooth out |
| Peeling seams | Insufficient adhesive | Apply additional adhesive under seams with small brush |
| Pattern misalignment | Poor planning | Prevent by dry-fitting and planning before cutting |
| Shrinking/gaps | Wipe immediately with a clean, damp sponge | Work in a climate-controlled environment |
| Paste on surface | Over-application of adhesive | Wipe immediately with clean, damp sponge |
Aftercare and Maintenance for Your New Wallpaper
Short-Term Care (First 48 Hours)
- Maintain consistent room temperature
- Avoid creating drafts near freshly installed wallpaper
- Don’t touch or clean the wallpaper for at least 24 hours
- Keep furniture away from walls until completely dry
Long Term Maintenance
- Dust with a soft cloth or vacuum with a brush attachment
- Clean washable wallpaper with mild soap and water
- Test cleaning solutions on inconspicuous areas first
- Address stains immediately for best results
- Keep direct sunlight exposure to a minimum to prevent fading
FAQ: Wallpaper Installation in Dubai
Ready to Transform Your Dubai Home?
Now you know how to install wallpaper like a pro in your Dubai home. With patience, the proper tools, and these expert techniques, you can achieve stunning results that will transform your space.
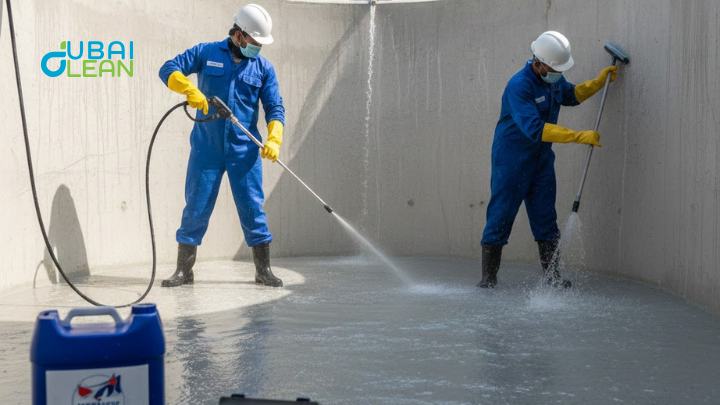
If you’d prefer professional assistance with your wallpaper project, DubaiClean offers expert installation services throughout Dubai. Our experienced team handles everything from wall preparation to perfect installation.
Contact DubaiClean today:
- Phone: +971 56 100 4127
- WhatsApp: +971 56 100 4127
- Email: info@dubaiclean.com