Wondering how to deep clean a house after renovation in Dubai? After a renovation, your home might look fresh and exciting but beneath that new look, there’s often a layer of dust, debris, and construction residue. A proper post-renovation cleaning is essential to make your Dubai home safe, healthy, and truly livable. From removing leftover building materials to sanitizing every surface, deep cleaning ensures your home not only looks new but also feels complete and refreshing.
Why Post-Renovation Cleaning Is Essential
Health Hazards of Construction Dust
Renovation dust is not like regular dust. It can carry tiny particles from materials like drywall, cement, paint, insulation, and even fiberglass. When this dust gets into the air, it can be harmful to breathe in, especially for people with asthma, allergies, or weaker immune systems, like children and the elderly. If left unchecked, it can cause coughing, breathing problems, or trigger allergic reactions. That is why deep cleaning after renovation is so important; it helps remove these hidden risks and keeps your home safer for everyone.
Improving Indoor Air Quality After Renovation
Dust and VOCs (volatile organic compounds) from things like glue, paint, and varnish can stay in the air long after the renovation is finished. These can make your eyes, throat, or lungs feel irritated and leave your home feeling stuffy or uncomfortable. A good deep clean helps clear out these hidden leftovers by removing them from the walls, furniture, carpets, and air vents. This not only freshens up your space but also makes the air cleaner and healthier for everyone in your home.
Enhancing the Final Look of Your New Space
No matter how great your renovation looks, things like dusty baseboards, smudged glass, or paint spots on the floor can take away from the overall feel. These little details can make the space seem unfinished or not fully cared for. A thorough deep clean helps bring out the real beauty of your home by wiping away all those leftovers, making everything shine, and leaving the space feeling fresh, welcoming, and ready to enjoy.
Pre-Cleaning Preparations
Safety First: Ventilation and Protective Gear
Before you start cleaning, it is important to keep safety in mind. Open all the windows and doors to let fresh air in and help clear out any dust or leftover smells from paints or chemicals. Make sure to wear protective gear like strong gloves, a good-quality mask, and safety glasses. This helps protect you from breathing in dust or getting hurt by sharp bits like nails, glass, or wood splinters that might still be around.
Gather the Right Cleaning Supplies
Getting ready before you start cleaning makes everything easier. Make sure you have all your supplies ready to go. You’ll need microfiber cloths for dusting, strong trash bags for throwing out debris, a mop and bucket for the floors, a HEPA vacuum to catch fine dust, and safe, non-toxic cleaners for different surfaces. Also, keep things like dusters, scrub brushes, and a ladder nearby for hard-to-reach spots. Having everything in place saves time and helps you clean more smoothly without unnecessary stops.
Open Windows and Let the Dust Settle
Once the renovation is done, it’s a good idea to give the dust some time to settle before you start cleaning. Open the windows to let in fresh air, which helps clear out any remaining smells and floating dust. Waiting a few hours allows most of the fine dust to land on surfaces, making it easier to clean instead of spreading it around again. It’s a simple step, but it makes the whole cleaning process smoother and more effective.
Room-by-Room Deep Cleaning Checklist
| Areas | Tasks |
| Living Room and Bedrooms | Dust ceiling fans, shelves, and light fixturesWipe walls, furniture, and baseboardsVacuum carpets and mop floorsClean windows and vents |
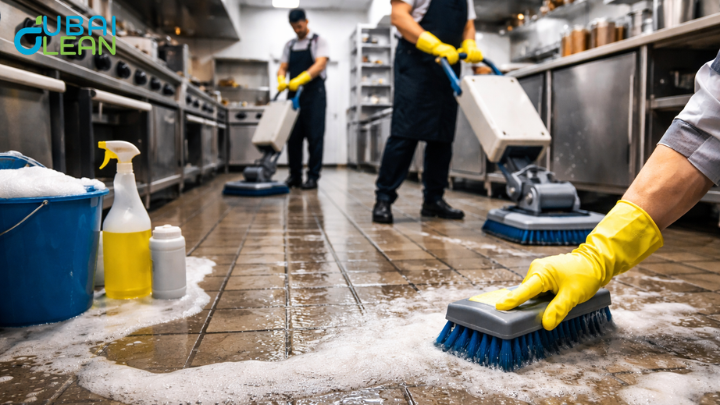
| Kitchen (Degrease and Disinfect Thoroughly) | Clean all cabinets inside and outWipe down counters and backsplashSanitize new appliances and fixturesMop floors and clear out dust behind appliances |
| Bathrooms (Sanitizing Newly Installed Fixtures) | Clean mirrors, tiles, and groutDisinfect toilets, sinks, and bathtubsWipe cabinets and sanitize faucetsRemove adhesive or paint marks |
| Utility and Storage Areas | Sweep and mop floorsDust off shelves and cornersClean any mechanical equipment or toolsEnsure laundry areas are lint-free and tidy |
Step-by-Step Deep Cleaning Process
Step 1: Remove Large Debris and Trash
Start by getting rid of any leftover renovation mess like wood pieces, packaging, broken tiles, nails, screws, or bits of glass. Clearing out this stuff first makes the space safer and gives you room to clean properly. It also helps you see what areas need attention. Make sure to throw things away the right way, especially anything hazardous like paint cans or chemicals, so you stay safe and follow proper disposal rules.
Step 2: Dusting Ceilings, Lights, and Vents
Dust usually collects on high spots first, so it’s best to start cleaning from the top. Use a microfiber duster or a vacuum with a long attachment to reach ceiling fans, lights, and air vents. Don’t forget the corners and spots around recessed lights where dust and cobwebs often build up. Cleaning these areas first helps keep dust from falling onto places you’ve already cleaned later on.
Step 3: Cleaning Walls, Doors, and Baseboards
Even if they look clean, walls can hold a thin layer of dust from the renovation. Use a damp microfiber cloth or sponge to gently wipe them down, starting at the top and moving downward. Be sure to clean around light switches, door handles, baseboards, and door frames too, since these spots often pick up dust, smudges, and fingerprints during the work.
Step 4: Deep Cleaning Floors Based on Material
Hardwood
Use a damp (not wet) mop with a pH-neutral wood floor cleaner. Avoid oversaturation to prevent warping or damage.
Tiles
Scrub grout lines with a soft-bristled brush and clean tile surfaces with a disinfectant solution to remove adhesive, dust, or paint splatters.
Carpets
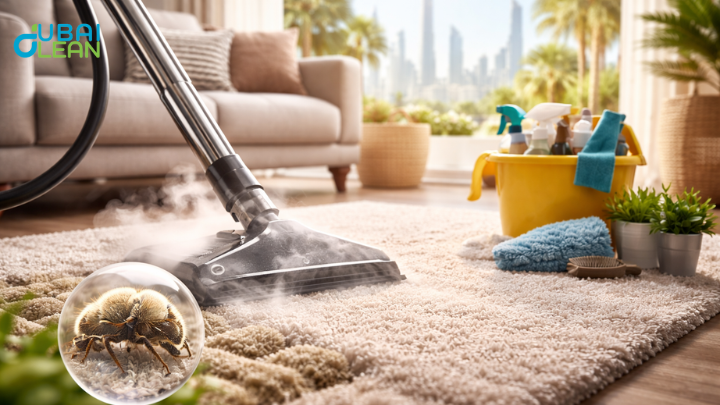
Vacuum thoroughly using a vacuum equipped with a HEPA filter. For better results, consider steam cleaning to eliminate embedded dust, allergens, and construction residue.
Step 5: Wiping Windows, Frames, and Glass
Use a streak-free glass cleaner to clean all your windows, mirrors, and glass surfaces so they look clear and shiny. Make sure to also wipe down the window frames, tracks, and sills, as dust, dirt, and paint spots often collect there. It’s a good idea to open and close each window too, to make sure they work properly and nothing is stuck in the tracks.
Step 6: Cleaning HVAC Vents and Filters
During the renovation, your HVAC system probably pulled in a lot of dust, so it’s important to give it a good clean. Take off the vent covers and use a vacuum with a hose attachment to clean inside the ducts. If your air filters are disposable, replace them. If they’re reusable, give them a proper wash following the instructions. This helps keep the air in your home clean and stops dust from being blown back into rooms you’ve already cleaned.
Tools and Products You’ll Need
HEPA Filter Vacuums and Microfiber Cloths
HEPA vacuums are great for post-renovation cleaning because they trap fine dust that regular vacuums often miss. Use them along with microfiber cloths, which grab and hold dust instead of spreading it around. This makes them perfect for cleaning surfaces, vents, and furniture without sending dust back into the air.
Non-Toxic Surface Cleaners
Choose non-toxic, eco-friendly cleaners that are safe to use around kids, pets, and delicate surfaces. These gentle but effective products help remove dirt, grease, and leftover residue without leaving behind strong smells or harmful chemicals, which is especially important after a renovation when the space needs to be fresh and healthy.
Specialty Products for Paint and Grout Residue
After a renovation, you might find tough spots like dried glue, paint splashes, or a cloudy layer on tiles called grout haze. To deal with these, use adhesive removers for sticky marks and grout haze removers to clear up tile surfaces. These special products help make the cleanup quicker and get better results without much scrubbing.
DIY vs. Professional Post-Renovation Cleaning
When DIY Is Feasible
DIY cleaning works well if your renovation was something small, like painting a room, changing a few fixtures, or putting up new shelves. With the right tools, a little patience, and some effort, you can handle the dust and mess on your own. It’s a budget-friendly option and pretty manageable when only a small part of the house is involved.
Signs You Need a Professional Cleaning Service
If renovation included major changes, covered several rooms, or involved heavy construction, it’s a good idea to bring in a professional cleaning service. Fine dust, tough stains, and debris in hard-to-reach areas can be hard to clean properly without the right tools and equipment.
How Long Does Post-Renovation Cleaning Take?
How long post-renovation cleaning takes really depends on the size of your space and how big the project was. Cleaning a small apartment or one renovated room might take around 4 to 6 hours. But if your whole house was renovated with major work and new installations, it could take a full day or more. The more detailed the job, the longer the cleanup. Professional cleaners can finish faster because they have the right tools and know-how to get it done efficiently.
Final Thoughts
Post-renovation cleaning is the last but most important step in turning your space from a work zone into a home you can truly enjoy. It’s more than just wiping down surfaces, it’s about clearing out fine dust, debris, and hidden messes that can affect how your home looks and feels. Whether your project was big or small, taking the time to clean properly makes a real difference. It not only freshens up the space but also makes it safer, healthier, and ready to live in.
Want a complete room-by-room guide? Check out our next blog on how to clean your home from top to bottom.