Regrouting your shower tiles is more than just a cosmetic update it’s essential for maintaining a functional and attractive bathroom. Over time, grout can crack, stain, or deteriorate, allowing moisture to seep in, which may lead to water damage, mould growth, and an overall worn-out look. In humid environments like Dubai, tiles are prone to faster wear, making regular care crucial. Whether you want to restore your shower’s original charm or prevent potential damage, regrouting is a simple yet effective solution.
1. Materials You’ll Need for regrouting
Grout Removal Tool: A grout saw or rake is essential for safely removing old, cracked, or discolored grout without scratching or damaging your tiles. Manual versions give you more control for delicate tiles, while electric models speed up the process for larger areas. Take care to remove all loose grout to ensure the new grout adheres properly.
New Grout: Select a grout specifically designed for wet areas like showers. Epoxy grout is highly water-resistant, durable, and less prone to staining, while cement-based grout with a water-resistant sealant offers good protection and easier handling. Matching the color to your existing tiles can help maintain a seamless look.
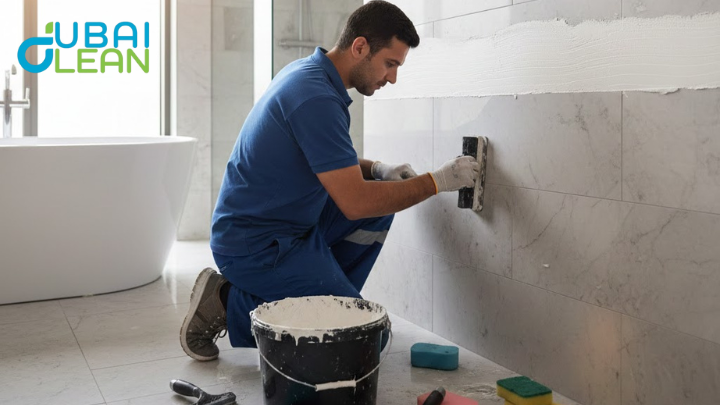
Grout Float: This tool, usually made of rubber, helps push grout into the joints evenly and removes excess grout from the tile surface. Using the float at a 45-degree angle ensures grout fills all gaps completely, preventing future cracks or gaps.
2. Step-by-Step Guide to Your Shower Tiles
Regrouting your shower tiles can seem daunting, but breaking the process into clear steps makes it manageable and ensures professional-looking results. From removing old grout to applying new grout, cleaning excess, and sealing the joints, following a systematic approach helps prevent mistakes and protects your bathroom from water damage. With patience and the right tools, you can restore your tiles’ appearance and maintain a clean, watertight shower.
| Step | What to Do | Tips for Best Results |
|---|---|---|
| 1 | Remove old grout | Use a grout saw or rake carefully to avoid chipping tiles; work slowly on corners and edges. |
| 2 | Clean the gaps | Vacuum or brush out debris, ensuring the joints are dry and free of dust for proper adhesion. |
| 3 | Mix new grout | Follow manufacturer instructions; ensure the consistency is smooth but not too runny. |
| 4 | Apply grout | Use a grout float at a 45-degree angle, pressing grout firmly into the joints. |
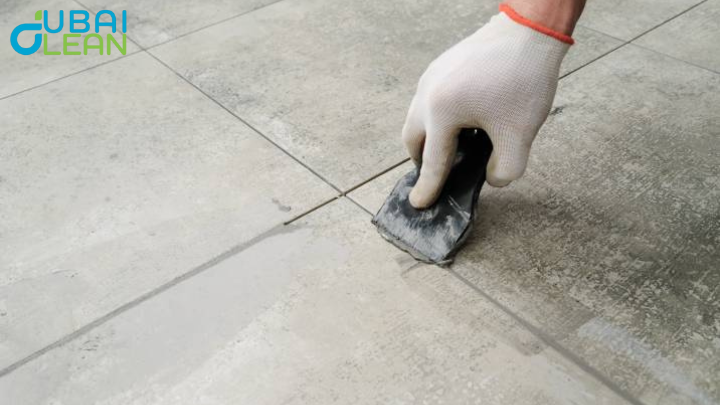
| 5 | Wipe excess grout | Use a damp sponge to remove residue, rinsing often, but avoid disturbing the grout lines. |
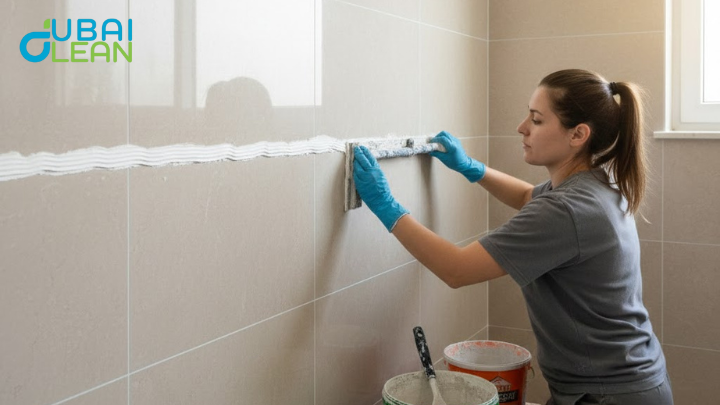
3. Tips for a Professional Finish
1. Work in Small Sections and Take Your Time: Tackle your shower in manageable areas rather than applying grout to the entire surface at once. This allows you to focus on each section, ensuring the grout is pressed firmly into the joints and smoothed evenly before it starts to set. Rushing can lead to uneven lines, air pockets, or grout spilling onto tiles, making the finish look messy.
2. Use Consistent Pressure and Proper Tools: When applying grout with a float, maintain even pressure and hold it at a 45-degree angle to fully fill the gaps. Avoid pressing too hard, which can push grout out of the joints, or too lightly, which can leave air pockets. Using the right tools—a quality grout float, sponge, and clean water makes a big difference in achieving a uniform, professional-looking finish.
3. Clean Thoroughly and Seal Carefully: Immediately wipe off excess grout with a damp sponge, rinsing frequently to prevent a hazy residue. Be careful not to disturb the grout lines while cleaning. Once the grout has fully cured, apply a high-quality grout sealer to protect against water, stains, and mildew. This step is especially crucial in humid climates like Dubai, as it ensures durability, prevents mold growth, and keeps your shower looking pristine for years.
4. Common Mistakes When Regrouting Shower Tiles
Regrouting your shower tiles may seem simple, but small mistakes can lead to long-term problems like cracking, staining, or water damage. Many homeowners unknowingly skip crucial steps or use improper materials, which can compromise the durability and appearance of their tiles. Understanding these common pitfalls can save time, effort, and money. Following the correct procedures ensures a professional-looking finish and a long-lasting, watertight shower.
- Using the Wrong Type of Grout: Standard cement-based grout is not ideal for wet areas; always choose water-resistant grout like epoxy.
- Skipping the Grout Sealing Step: Unsealed grout is prone to stains, moisture damage, and mildew.
- Not Removing Old Grout Thoroughly: Remnants of old grout can prevent proper adhesion, leading to uneven or weak joints.
- Over-application of Grout: Applying too much grout causes messy lines and makes cleaning difficult.
- Not Cleaning Excess Grout Quickly: Allowing grout to dry on tiles creates a stubborn haze that’s hard to remove.
- Ignoring Proper Drying Time: Using the shower before grout cures can damage the grout lines and cause cracks.
- Neglecting Caulking: Skipping caulk where tiles meet walls or tubs allows water to seep behind tiles, increasing the risk of mould.
- Rushing the Process: Trying to finish too quickly can compromise every step, from application to sealing.
Avoiding these common mistakes is key to achieving a smooth, durable, and watertight shower finish. By using the right grout, thoroughly removing old grout, cleaning excess promptly, sealing correctly, and applying caulk where needed, you can prevent water damage, mould growth, and grout deterioration. Following these steps ensures your shower remains both functional and visually appealing for years to come.
5. When to Consider Professional Services
Regrouting your shower tiles can be a rewarding DIY task, but there are situations where calling in professionals is the best choice. Here are some scenarios when professional tile regrouting services are worth considering:
Regrouting your shower tiles is an effective way to enhance both the appearance and functionality of your bathroom, but certain situations call for professional help. Large or complex tile areas, intricate grout lines, or tight corners can make DIY regrouting overwhelming and time-consuming, while damaged, cracked, or loose tiles may require repairs or replacements before new grout can properly adhere. A lack of time or experience, persistent mould or mildew issues, and the need for a high-quality, durable finish are also key reasons to call a professional. Experts ensure consistent grout lines, proper sealing, and a waterproof barrier to prevent water damage and mould growth, using the right materials and techniques for a long-lasting result. For residents in Dubai, hiring professional tile regrouting services guarantees a flawless, efficient, and durable finish, giving your shower a clean, polished look while avoiding common DIY mistakes.
Conclusion
Regrouting your shower tiles is a simple yet essential step in maintaining a clean, functional, and visually appealing bathroom. By using the right materials, following proper techniques, and addressing common mistakes, you can achieve long-lasting results that protect against water damage and mould growth. Whether you choose to tackle the project yourself or hire professional services in Dubai, ensuring careful application, proper sealing, and attention to detail will keep your shower tiles looking flawless and durable for years to come.